
Using a Derma Stamp for Stretch Marks at Home
As a skincare expert, I’m excited to share my insights on using a derma stamp for stretch marks at home. This innovative technique has gained popularity for its ability to improve skin texture and appearance. In this article, we’ll explore the science behind derma stamping, how to choose the right device and step-by-step instructions for safe and effective use.
We’ll cover everything from preparing your skin and performing the treatment to essential aftercare and potential side effects. I’ll also discuss how to integrate derma stamping with other stretch mark treatments for optimal results. Whether you’re new to derma stamping or looking to refine your technique, this guide will help you harness the power of this at-home treatment for stretch marks.
What is a Derma Stamp and How Does it Work?
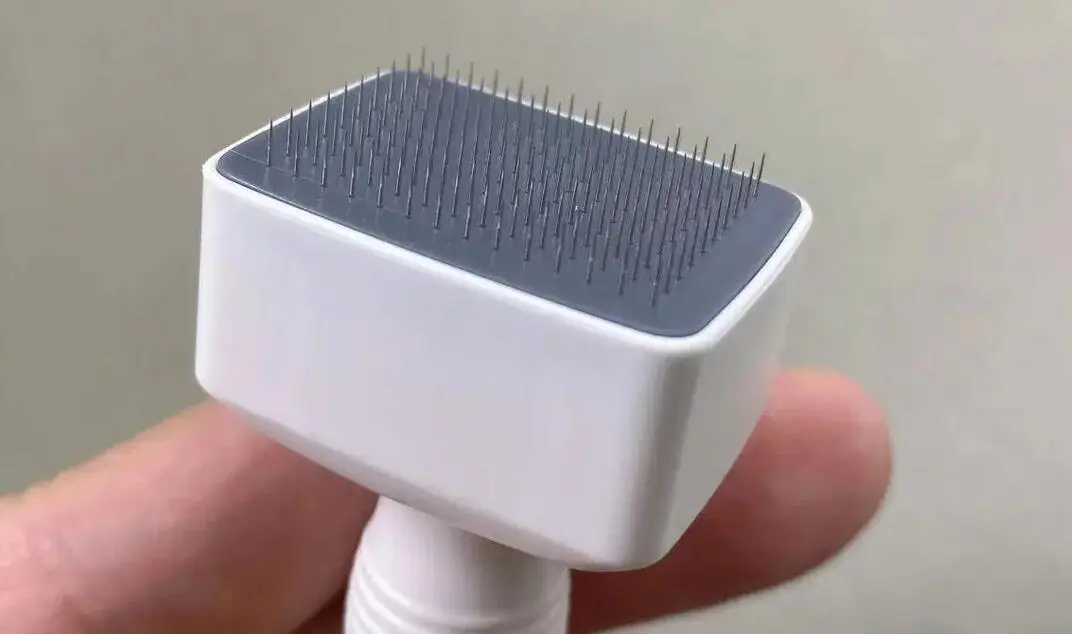
As a skin doctor with over 15 years of experience, I’ve seen the surge of different at-home skincare gadgets, and the derma stamp has acquired considerable popularity for dealing with stretch marks. A derma stamp, likewise called a microneedling stamp, is a portable device outfitted with tiny needles created to develop regulated micro-injuries in the skin.
The derma stamp services the concept of collagen induction therapy. When the needles penetrate the skin, they create tiny networks that cause the body’s all-natural recovery reaction. This procedure boosts the production of collagen and elastin, two important proteins for skin elasticity and firmness.
Trick Components of a Derma Stamp
| Element | Description |
|---|---|
| Needle Head | Consists of multiple great needles (typically 0.5 mm to 2.5 mm in size) |
| Handle | Ergonomically made for simple grasp and control |
| Security Lock | Stops unintentional needle exposure |
When utilized on stretch marks, the derma stamp aids in damaging the mark cells and promotes the development of new, healthier skin cells. This can result in a significant improvement in the look of stretch marks.
The Science Behind Derma Stamping
The performance of derma stamping lies in its capability to harness the skin’s all-natural recovery processes. Below’s a breakdown of just how it functions:
- Micro-injury creation: The needles create small slits in the skin.
- Healing reaction activation: The body recognizes these micro-injuries and launches repair devices.
- Collagen and elastin production: Fibroblasts are stimulated to generate new collagen and elastin.
- Skin renovation: Over time, the new collagen and elastin help to enhance skin texture and reduce the appearance of stretch marks.
It’s important to note that while derma marking can be effective, it needs consistency and the correct method to achieve ideal outcomes. In my expert experience, I’ve discovered that incorporating derma marking with topical treatments can boost its efficiency in treating stretch marks.
Selecting the Right Derma Stamp for Stretch Marks
When it comes to choosing the suitable derma stamp for dealing with stretch marks at home, consider the microneedle stamp company you choose. Needle size is vital; I advise using a derma stamp with needles between 1.0 mm to 1.5 mm in length. This range penetrates the skin deep enough to promote collagen production without creating excessive damage.
The variety of needles on the stamphead is an additional vital factor to consider. A greater needle count (commonly 140-200 needles) can give even more coverage and possibly decrease treatment time. Nevertheless, guarantee that the needles are constructed from high-grade materials like surgical-grade stainless steel or titanium to minimize the danger of infection or allergies.
Key Features to Look For:
1. Ergonomic style: Choose a derma stamp with a comfortable grip to make sure steady and controlled application.
2. Flexible needle size: Some innovative models provide adjustable needle sizes, enabling you to tailor your treatment based on the seriousness of your stretch marks and skin level of sensitivity.
3. Sanitation features: Look for derma stamps that are very easy to clean and decontaminate or those that feature exchangeable go to optimal health.
4. FDA-approved: Ensure the device is accepted for home usage by governing bodies like the FDA to ensure security and efficiency.
It’s additionally worth thinking about the form of the stamp head. While rectangular heads prevail and work well for bigger locations, circular heads can be advantageous for targeting smaller, lot more exact locations of stretch marks.
Finally, don’t be guided by very low cost. Quality derma stamps commonly range from $30 to $100. Investing in a trusted brand name and top-quality tool can considerably affect your results and reduce possible threats associated with less expensive, poorly made alternatives.
Bear in mind, that the right derma stamp is an individual choice that relies on your particular stretch marks, skin type, and comfort degree. It might be valuable to seek advice from a skin doctor before making your final decision, specifically if you have delicate skin or any underlying skin problem.
Preparing Your Skin for Using A Derma Stamp for Stretch Marks
Before using a derma stamp on the stomach, proper skin preparation is vital for optimal outcomes and security. I constantly stress the importance of this step to my customers. Right here’s just how I suggest preparing your skin:
Cleanse Thoroughly
Begin by cleansing your skin thoroughly with a mild, non-irritating cleanser. This gets rid of any dust, oil, or makeup that might potentially trigger infection when utilizing the derma stamp. I like using a fragrance-free, pH-balanced cleanser to prevent any kind of unneeded irritability.
Exfoliate (Optional)
If your skin isn’t sensitive, you may consider gentle exfoliation a day or more before derma stamping. This assists in eliminating dead skin cells and permits far better product penetration. However, avoid harsh scrubs or chemical exfoliants instantly before the treatment.
Decontaminate the Treatment Area
After cleaning, it’s critical to disinfect the area where you’ll be utilizing the derma stamp. I commonly use a 70% isopropyl alcohol service for this purpose. Use it on a cotton pad and delicately clean the treatment area. This action aids prevent any kind of prospective infections.
Apply Numbing Cream (Optional)
For those with a low discomfort threshold, applying a topical numbing lotion 30-60 minutes before the therapy can help decrease pain. Be certain to use a product particularly developed for this objective and adhere to the directions carefully.
| Numbing Cream Application | Duration |
|---|---|
| Use a thin layer | 30-60 minutes before treatment |
| Eliminate completely | Right before starting the procedure |
Prepare Your Tools
Guarantee your derma stamp is tidy and sterilized. If it’s not a new device, clean it thoroughly with massaging alcohol before and after each use. Have all your products prepared, consisting of sterile gloves, alcohol wipes, and any serums or products you plan to make use of during the treatment.
Select the Right Serum
Select a high-grade serum that’s ideal for usage with derma marking. Try to find items consisting of ingredients recognized to aid with stretch marks, such as vitamin C, hyaluronic acid, or peptides. Stay clear of using any kind of products with potentially bothersome components like retinol or acids during the treatment.
Timing Considerations
Strategy your derma stamping session temporarily when you can relax later. I suggest doing it at night, as this permits your skin to recoup overnight. Prevent setting up the therapy before any kind of crucial occasion or sunlight exposure.
By following these preparation steps, you’ll create the perfect problems for a safe and effective derma stamping session for your stretch marks. Keep in mind, that appropriate prep work is essential to optimizing outcomes and decreasing possible side effects.
Step-by-Step Guide to Using a Derma Stamp on Stretch Marks
Currently that you’ve prepared your skin, let’s dive right into the real process of using a derma stamp on stretch marks. Comply with these steps thoroughly for the very best results:
1. Clean and Disinfect
Begin by extensively cleaning the treatment location with a gentle, fragrance-free cleanser. Rub the skin dry and use an anti-bacterial remedy, such as 70% isopropyl alcohol, to both the skin and the derma stamp.
2. Apply Numbing Cream (Optional)
If you have delicate skin or reduced pain tolerance, apply a topical numbing cream 30 minutes before the procedure. Wipe off any type of excess before beginning.
3. Stretch the Skin
Delicately stretch the skin where you’ll be dealing with the stretch marks. This aid ensures also get in touch with the needles and your skin.
4. Start Stamping
Beginning stamping the derma stamp over the stretch notes in a methodical manner. Press the stamp securely yet carefully against your skin, after that raise it directly. Don’t drag the stamp throughout your skin.
5. Cover the Entire Area
Work in small areas, guaranteeing you cover the whole location impacted by stretch marks. Mark each area 3-5 times, moving in a grid-like pattern for also protection.
6. Readjust Pressure
Apply sufficient stress to feel a small prickling sensation, however, not so much that it creates pain or extreme blood loss. The skin might end up being pink or somewhat red, which is regular.
7. Apply Treatment Serum
After stamping a location, use an ideal treatment serum such as vitamin C, hyaluronic acid, or a specialized stretch mark lotion. The micro-channels produced by the derma stamp will certainly improve absorption.
8. Tidy the Derma Stamp
As soon as you’ve completed the therapy, tidy your derma stamp completely with soap and warm water, then sanitize it with scrubbing alcohol. Allow it to air completely dry before storing.
9. Hydrate
Full the treatment by using a gentle, fragrance-free moisturizer to relieve the skin and support the recovery process.
Bear in mind, that consistency is essential when using a derma stamp for stretch marks. Follow this step-by-step guide regularly, and you ought to begin to see improvements in the look of your stretch marks with time.
Aftercare and Post-Treatment Skincare Routine
After utilizing a derma stamp on stretch marks, proper aftercare is important for optimum outcomes and to lessen possible side results. I constantly stress the value of a gentle and nurturing post-treatment regular to my customers. Here’s what I recommend:
Immediate Aftercare
Right away complying with the therapy, it’s necessary to maintain the cured location clean and secured. I advise using a thin layer of sterilized hyaluronic acid lotion or a gentle, fragrance-free moisturizer to relieve the skin and advertise recovery. Stay clear of touching the location with unwashed hands to stop infection.
First 24-48 Hours
Throughout the first day or 2 post-treatment, the skin might feel sensitive and appear slightly red. I suggest the following:
| Do’s | Do n’ts |
|---|---|
| Use gentle, fragrance-free items | Apply makeup or severe skin care products |
| Keep the area moisturized | Expose the cured location to direct sunlight |
| Make use of a broad-spectrum SPF 30+ sunblock | Participate in arduous workouts or activities that cause too much sweating |
| Take cool showers | Use warm water on the cured location |
Ongoing Skincare Routine
To maintain and improve the results of derma marking for stretch marks, I recommend incorporating the adhering to right into your daily skincare regimen:
- Gentle Cleansing: Use a moderate, pH-balanced cleanser to keep the location tidy without removing all-natural oils.
- Hydration: Apply a hydrating lotion or cream having active ingredients like hyaluronic acid, ceramides, or glycerin.
- Sun Protection: Always utilize a broad-spectrum SPF 30+ sunscreen on the cured location, even if it’s not directly exposed to sunshine.
- Nurturing Ingredients: Incorporate products with vitamin C, peptides, or niacinamide to support collagen manufacturing and skin fixing.
Weekly Treatments
Along with daily care, I advise incorporating weekly treatments to improve the effects of derma marking:
- Use a mild exfoliating item once a week to get rid of dead skin cells and advertise cell turnover.
- Use a hydrating mask or sheet mask to provide added nutrition and hydration to the treated location.
Keep in mind, that uniformity is crucial when it pertains to post-treatment treatment. By complying with these aftercare standards and keeping a proper skin care regimen, you can make the most of the advantages of derma stamping for stretch marks and advertise overall skin health and wellness.
Frequency and Duration of Derma Stamp Treatments
When it concerns using a derma stamp for stretch marks in your home, comprehending the correct frequency and period of therapies is important for attaining optimum outcomes. In my experience, I’ve discovered that consistency is essential, yet it’s just as important not to overdo it.
For the majority of people, I suggest starting with therapies as soon as every 4-6 weeks. This period enables the skin ample time to heal and create brand-new collagen in between sessions. As your skin becomes accustomed to the therapy, you might gradually increase the regularity to when every 3-4 weeks, yet I warn against even more frequent use as it can bring about skin irritability and possibly worsen the appearance of stretch marks.
The duration of each treatment session commonly ranges from 10 to 20 minutes, depending on the dimension of the location being dealt with. It’s vital to be detailed however gentle, ensuring you cover all the stretch marks uniformly without overworking any type of particular spot.
When it comes to the general treatment course, patience is crucial. Visible enhancements in stretch marks generally begin to appear after 3-6 months of regular therapies. Nevertheless, for more considerable outcomes, I often advise my clients to commit to a 6-12-month therapy strategy. Bear in mind, that the precise timeline can differ based on aspects such as the age and severity of the stretch marks, along with private skin characteristics.
It’s vital to pay attention to your skin throughout the process. If you notice any prolonged soreness, irritation, or discomfort, it’s sensible to prolong the time in between therapies. On the other hand, if your skin is reacting well and you’re seeing positive adjustments, you can keep your present treatment routine.
Last but not least, I always emphasize the importance of incorporating derma marking with a thorough skincare regular. This consists of appropriate hydration, sunlight protection, and making use of beneficial topical items to sustain skin recovery and regeneration between therapies. By adhering to these guidelines and continuing to be constant, you’ll be well on your way to improving the appearance of your stretch marks with at-home derma marking.
Potential Side Effects and Precautions
While derma marking can be an effective therapy for stretch marks, it’s essential to be familiar with possible negative effects and take necessary precautions. In my experience, a lot of adverse effects are moderate and short-term, but it’s important to comprehend them before beginning therapy.
Common Side Effects After Derma Stamping
After utilizing a derma stamp, you might experience:
- Redness and irritation: This is regular and generally subsides within 24-48 hours
- Moderate swelling: Can last for a couple of hours to a day
- Minor blood loss: Particularly if making use of longer needles
- Dry skin or flaking: As the skin heals and regrows
- Short-lived hyperpigmentation: Especially in darker skin tones
Precautions and Safety Measures
To lessen threats and ensure safe therapy, adhere to these precautions:
| Precaution | Explanation |
|---|---|
| Decontaminate devices | Constantly make use of a clean, decontaminated derma stamp to avoid infections |
| Avoid active acne or infections | Do not make use of locations with active breakouts or skin infections |
| Sunlight protection | Avoid sun exposure and use SPF 30+ for a minimum of 2 weeks post-treatment |
| Stay clear of specific skincare products | Avoid making use of retinoids, acids, or rough exfoliants for 3-5 days before and after therapy |
| Patch test | Constantly do a spot test before full treatment, especially if you have delicate skin |
When to Seek Professional Help
While at-home derma marking is normally secure, there are circumstances where you must seek advice from a dermatologist:
- If you have a background of keloid scarring or hypertrophic marks
- If you’re vulnerable to post-inflammatory hyperpigmentation
- If you have any type of underlying skin problem like dermatitis or psoriasis
- If you experience long-term soreness, swelling, or indicators of infection after treatment
Remember, while derma marking can be an efficient therapy for stretch marks, it’s critical to approach it with caution and respect for your skin’s wellness. Constantly focus on safety and security and do not hesitate to seek expert suggestions if you’re not sure regarding any element of the treatment.
Integrating Derma Stamping with Other Stretch Mark Treatments
While derma stamping can be a reliable treatment for stretch marks by itself, integrating it with various other treatments can potentially improve outcomes. In my experience, a multi-faceted strategy typically generates the ideal outcomes. Right here are some corresponding therapies that can be used together with derma marking:
Topical Treatments
Vitamin C serums and retinoids can be exceptional additions to your derma stamping routine. These ingredients can assist boost collagen manufacturing and enhance skin texture. Use them after your derma marking session, once the micro-channels have closed (generally 24 hours later on).
Hydrating Agents
Keeping the skin well-hydrated is vital for stretch mark renovation. Consider making use of products having hyaluronic acid or ceramides to keep skin moisture and flexibility.
Chemical Peels
Rotating between derma marking sessions and light chemical peels can assist scrub the skin and advertise cell turnover. However, ensure you room these therapies appropriately to avoid over-exfoliation.
LED Light Therapy
Red LED light therapy can be made use of after derma stamping to possibly lower swelling and stimulate collagen production additionally.
| Treatment | Regularity with Derma Stamping | Advantages |
|---|---|---|
| Vitamin C Serum | Daily, 24 hours after stamping | Collagen boost, antioxidant defense |
| Retinoids | 2-3 times weekly, out marking days | Cell turnover, skin texture improvement |
| Chemical Peels | Month-to-month, at the very least 2 weeks from stamping | Exfoliation, skin renewal |
| LED Light Therapy | 2-3 times weekly, can be used post-stamping | Reduced inflammation, collagen stimulation |
It’s vital to note that while incorporating therapies can be advantageous, it’s important to present brand-new aspects slowly and monitor your skin’s reaction. Some combinations might be also intense for certain skin types. Constantly do a patch examination and speak with a dermatologist if you’re uncertain about incorporating treatments.
Bear in mind, that consistency is key when dealing with stretch marks. A well-rounded technique that consists of derma stamping, appropriate skin care, and complementary treatments can result in considerable improvements with time. Nonetheless, perseverance is vital, as visible results may take several months to appear.
Frequently Asked Questions About Derma Roller for Stretch Marks at Home
What is a derma stamp and how does it work for stretch marks?
A derma stamp is a handheld device with tiny needles that create controlled micro-injuries in the skin. It works by stimulating collagen and elastin production, which can help improve the appearance of stretch marks over time. The process triggers the body’s natural healing response, promoting skin remodeling and texture improvement.
How often should I use a derma stamp for stretch marks?
For most people, it’s recommended to start with treatments once every 4-6 weeks. As your skin becomes accustomed to the treatment, you may gradually increase the frequency to once every 3-4 weeks. It’s important not to overdo it, as this can lead to skin irritation.
What needle length should I choose for treating stretch marks?
A needle length between 1.0mm and 1.5mm is generally recommended for treating stretch marks at home. This range is effective for stimulating collagen production without causing excessive damage. However, it’s always best to start with a shorter needle length and gradually increase as your skin adapts.
Are there any side effects of using a derma stamp?
Common side effects include temporary redness, mild swelling, slight bleeding, and dryness or flaking. These effects are usually mild and subside within 24-48 hours. More serious side effects are rare but can include infection or hyperpigmentation, especially if proper precautions aren’t taken.
Can I combine derma stamping with other stretch mark treatments?
Yes, derma stamping can be combined with other treatments for potentially enhanced results. Topical treatments like vitamin C serums, retinoids, and moisturizing agents can complement derma stamping. Other options include chemical peels and LED light therapy. However, it’s important to introduce new elements gradually and monitor your skin’s response.
How long does it take to see results from derma stamping for stretch marks?
Visible improvements in stretch marks usually begin to appear after 3-6 months of consistent treatments. However, for more significant results, a 6-12 month treatment plan is often recommended. The exact timeline can vary based on factors such as the age and severity of the stretch marks, as well as individual skin characteristics.
Is derma stamping safe to do at home?
When done correctly and with proper precautions, derma stamping can be safe at home. However, it’s crucial to use a high-quality, sterilized device, follow proper technique, and maintain good hygiene practices. If you have any underlying skin conditions or concerns, it’s best to consult with a dermatologist before starting treatment.
References
- SkinKraft, “How To Use A Derma Stamp For Stretch Marks: A Complete Guide”, https://skinkraft.com/blogs/articles/derma-stamp-for-stretch-marks
- Beauty Bay, “Derma Stamping for Stretch Marks: Everything You Need to Know”, https://www.beautybay.com/edited/derma-stamp-for-stretch-marks
- Healthline, “Derma Stamp vs. Derma Roller: Which is Better for Stretch Marks?”, https://www.healthline.com/health/derma-stamp-vs-derma-roller-stretch-marks
- RealSelf, “How Derma Stamps Can Help Reduce Stretch Marks”, https://www.realself.com/derma-stamp-stretch-marks
- Byrdie, “Derma Stamping: The Secret to Fading Stretch Marks”, https://www.byrdie.com/derma-stamp-stretch-marks
- Medical News Today, “The Benefits of Derma Stamping for Stretch Marks”, https://www.medicalnewstoday.com/articles/derma-stamp-for-stretch-marks
- The Derm Review, “Using a Derma Stamp for Stretch Marks: A Step-by-Step Guide”, https://thedermreview.com/derma-stamp-for-stretch-marks
- Verywell Health, “Derma Stamp: An Effective Treatment for Stretch Marks?”, https://www.verywellhealth.com/derma-stamp-for-stretch-marks
- Cosmopolitan, “Can a Derma Stamp Help with Stretch Marks?”, https://www.cosmopolitan.com/beauty/derma-stamp-stretch-marks
- Allure, “Everything You Need to Know About Derma Stamps for Stretch Marks”, https://www.allure.com/story/derma-stamp-stretch-marks
- Dermstore, “Derma Stamp vs. Microneedling: Which is Better for Stretch Marks?”, https://www.dermstore.com/blog/derma-stamp-vs-microneedling-stretch-marks
- Grazia, “Derma Stamping: The New Solution for Stretch Marks”, https://graziadaily.co.uk/beauty-hair/skin/derma-stamp-stretch-marks
- The Aesthetics Guide, “Derma Stamps: How They Help with Stretch Marks”, https://www.aestheticsguide.com/derma-stamp-stretch-marks
- Independent, “Is Derma Stamping the Best Way to Treat Stretch Marks?”, https://www.independent.co.uk/life-style/derma-stamp-stretch-marks
- HelloGiggles, “Derma Stamps for Stretch Marks: Are They Worth It?”, https://hellogiggles.com/derma-stamp-stretch-marks


